How to Create a Vision Board in 3 Easy Steps
Ahhhh…summer is drawing to an end, kids are headed back to school, vacations are wrapping up, and most of us will be settling back into our normal, non-summer routines at home and work.
I’ve got an idea…let’s not let summer slip away too quickly. Let’s do something fun today!
(NOTE: If you are reading this at another time of year, there’s no better day to create your vision board than today!)
You know how much I love and encourage journaling? Well, today’s fun “end of summer” project is kind of like journaling in a way.
We are going to create a vision board!!
If you’ve never created a vision board, you are in for a real treat! It’s super easy–I have listed out the supplies (they are minimal) you will need and have written out the three easy steps to create your board.
Making a vision board is fun to do on your own or in a group setting. Kids can create one, and I bet if I was visiting my 100-year-old Granny this weekend, I could convince her to make one too!
I create vision boards for two reasons: 1. It’s fun! When else do I get to play with paper, scissors and a glue stick? 2. It helps to keep my goals, my dreams, and the things I love and find joy in, at the forefront of my mind.
I’ve created several vision boards over the years and I keep them all. It’s fun to look back and see what has happened in my life since I created the earlier vision board. It’s also interesting to compare what I choose to include in my present day board versus the previous ones.
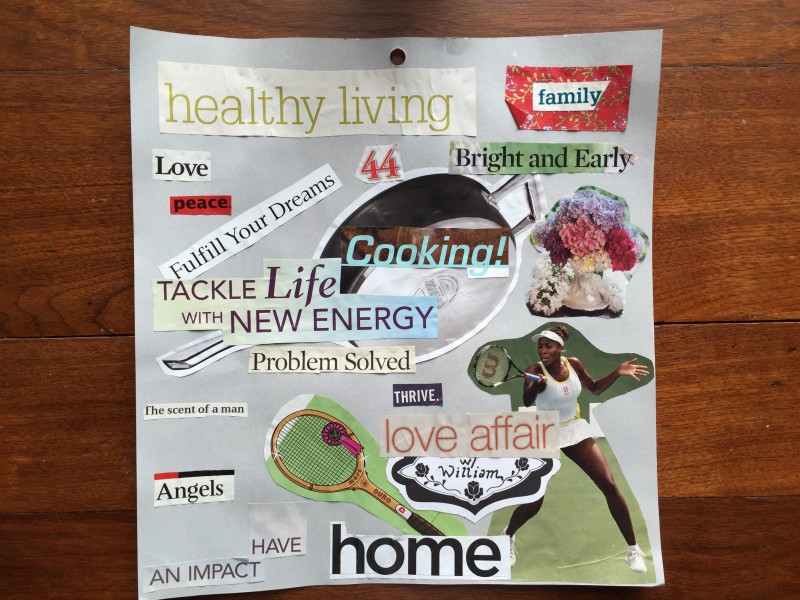
Here’s the last one I created about four years ago. A friend of mine had a bunch of ladies over to her house and we all sat around a table and created our vision boards. It was a ton of fun!
Now, here is the one that I am currently working on. I plan on finishing it this weekend.
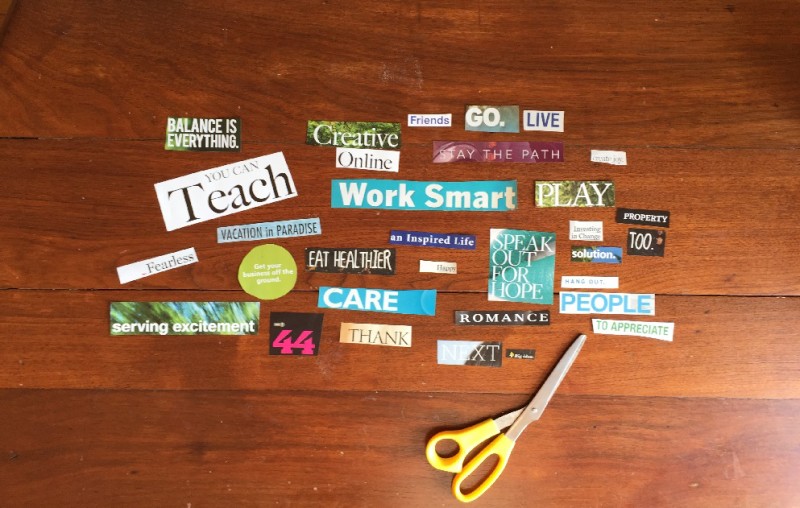
One BIG thing I noticed about this go round, is that I selected mostly words or phrases instead of images. I guess it makes sense, since over the last couple of years, I’ve spent a great deal of time writing. I do love words! There are a couple of images I will add to the mix, but I have to print those from my camera (family and places I love). I’m also going to write out a couple favorite quotes to include.
So, let’s get you started on creating your own vision board! I’ve included a supply list and instructions to create your own vision board in three simple steps.
By the way, you can easily do this project in one sitting, but if you prefer to stretch the process out collect the words and images over a couple of weeks, that’ll work too.
Have fun!
What you will need:
- A stack of magazines you don’t might cutting up. If you don’t have any, run by your local library and ask for their past issues. My library is happy for me to take their old magazines and “recycle” them in this way. You can also use your own photos for this step.
- A glue stick or rubber cement work the best. I wouldn’t suggest Elmer’s liquid glue because it makes the paper lumpy. If all you have is Elmer’s, just make sure to apply very thinly. You can use tape instead if you like, but you’ve got to decide if you mind seeing the exposed tape, or if you affix the tape to the back of the paper, if you mind the edges of the paper curling up.
- Poster board, cardstock, or printer paper.
NOTE: If you prefer, eliminate the glue/tape, and create your vision board pinning the papers to a cork bulletin board. You can also do this entire project on a computer, if you like. I personally like the paper, scissor, and glue method.
Vision Board Process:
- Flip through the pages of the magazines and cut out any word, phrase, or image that you are drawn to, that makes you happy, or is something you would like to strive for in the future—dream and goal related. You may want to go through your personal photos to include. Don’t think too hard in this step, just cut away. You may cut out 50 things and only use 20, and that’s ok.
- Now that you’ve got your pile of words and images that you’ve cut out or set aside, start sorting through and choose those that are most important to you. Remember you are creating this board as a visual for the life you want.
- Now arrange the pieces you have chosen on your paper and affix them. Arranging what goes where, is a big part of this creative process. You may want to place a big image of your “happy place” smack dab in the middle and have all the other pieces surrounding that.
That’s it! See how fun and simple this project will be?
All that’s left is to choose a place to display your vision board. You’ll want to hang it where you will see it often. In the past, I’ve hung my vision boards in a clearly visible place in my closet, so that I would see it every day. I may put the board I’m working on today in a picture frame and hang it in my writing nook.
While the process of creating the board is fun, the purpose behind it all, is to have a visual reminder of things you want in your life. When your goals and desires are right in front of you, you will be reminded and motivated to get out there and make your dreams come true!
Have fun creating your board! If you are willing to share, I’d love to see how yours turns out.
As always, I appreciate you hanging out with me today!
Jill xx
P.S. If you haven’t already subscribed, don’t delay…it’s free. My goal is that you leave my blog inspired, motivated, and clear on one thing you can do or think about that will make your life more fulfilled.


Great post Jill! I need to sit down and create a new vision board. I made one a long time ago, but you know how things change. I definitely need to do it now that I’m going to be an emptynester. I love how simple you make it sound with the 3 easy steps. Thanks for sharing!
Sharon, yes, it’s nice to update them every several years. I’ll be curious to see what yours includes now that you are an emptynester. You will definitely have more time on your hands. I know that my husband and I grew closer than ever after ours left the nest. Have fun with it and let me know how it goes! Thanks for reading and for your comment.
Thanks, what a clever idea. Will have to try it.
Pat, hope you enjoy the process. Let me know how yours turns out. Thanks for reading my blog!
Jill,
I love the idea of vision boards. The activity provides both clarity and validation. I use these with clients at times as well
Kathy, I love that you have your clients work on these too! Thanks for reading!
This is awesome. I’ve always wanted to create a vision board and your step by step directions leave me without an excuse. A vision board can serve as a much better reminder than dry erase makers and a whiteboard.
Hope you enjoy the creative process Pierre! Let me know how yours turns out. Appreciate you reading my blog! : )